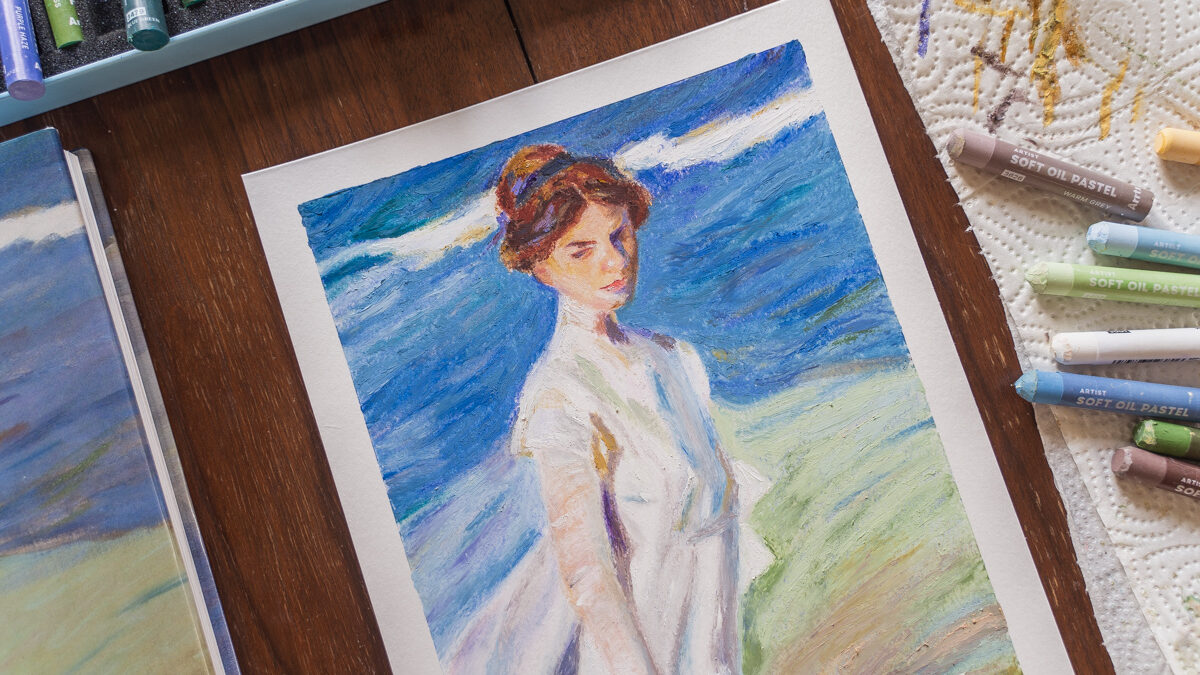
In this step by step oil pastel drawing for beginners we are copying one of the great master artists Joaquín Sorolla. This tutorial is easy to follow, will tell you what supplies you need and how to approach a portrait study like this. You can apply these steps and techniques to any other portrait reference.
If you want to learn the different oil pastel techniques first, then check out this article.
Materials
All you will need are oil pastels and a surface to draw on. I also used some linseed oil but that’s totally optional.
OIL PASTELS
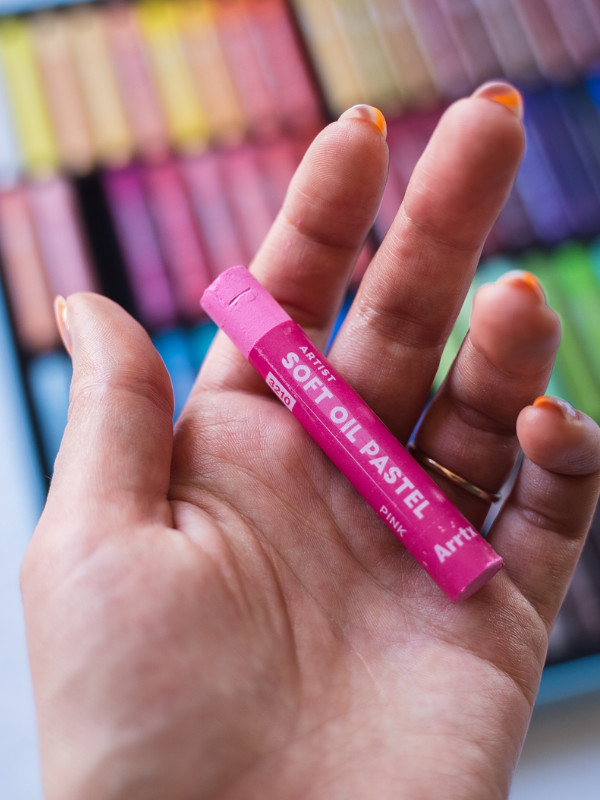
The oil pastels I used for this drawing are the Arrtx soft oil pastels (I reviewed them here) but you can use whatever pastels you have. I used quite a lot of colors and didn’t keep track of them but just pick whatever looks similar. If you only have a small range of colors you will need to mix more on the paper.
Here are some oil pastel options:
- Paul Rubens Haiya Oil Pastels Set ($27.99)
- Pentel Oil Pastels ($2.05 – $46.78)
- Van Gogh Oil Pastels and Sets ($2.80 – $51.41)
- Sennelier Oil Pastels and Sets ($3.75 – $297.00)
- Caran d’Ache Neopastels ($2.75 – $218.75)
PAPER
The paper I used for this oil pastel drawing for beginners is a mixed media oil and acrylic paper by Canson in the size A4.
Here are some options:
- Canson XL Oil and Acrylic Pads ($13.79 – $18.85)
- Sennelier Oil Pastel Card Pads ($23.16 – $81.32)
- Strathmore 400 Series Toned Gray Sketch Pad ($5.62 – $18.25)
What do I need to get started with oil pastels?
The reference
In this master study we are recreating Joaquín Sorolla’s oil painting Strolling along the Seashore from 1909. I used a cropped in reference that focuses on the woman on the right (who is Sorolla’s daughter Maria btw).

Step by step Process
Now let’s grab our oil pastels and get started.

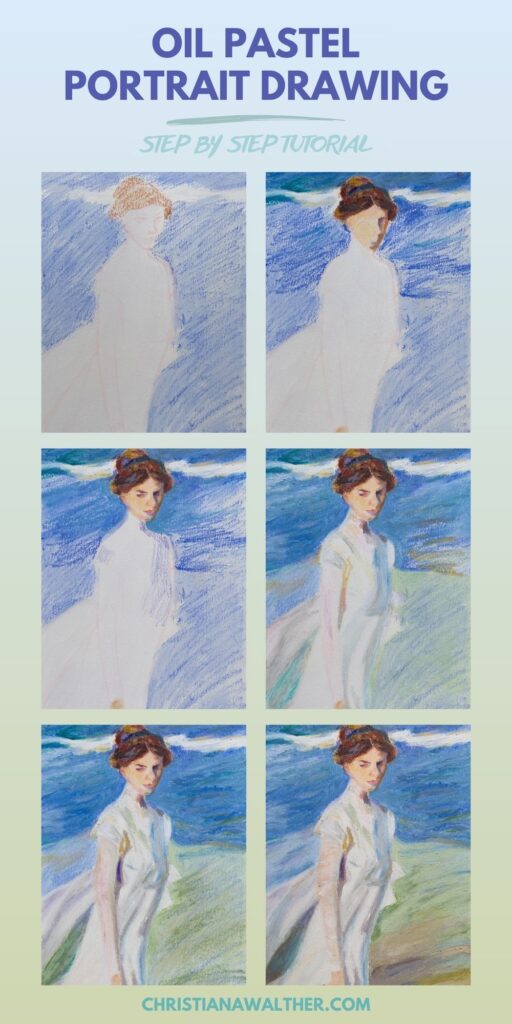
Step 1
The first thing I did was to lightly sketch the figure with a red pencil. I used red so no graphite would smudge with the oil pastels and turn the colors muddy.
Then I chose a dark blue oil pastel and lightly put the color down where the water is supposed to be. After that, I dipped a brush in some linseed oil and went over the blue oil pastel strokes to blend them into the paper. Don’t worry if you don’t have any painting oil. You can just smudge the pastel with your fingers or a paper towel.
For the hair we use an ochre oil pastel color. For the first layers it’s important to use little pressure when applying the color. Also leave the white of the paper white for the lightest parts of the painting.

Step 2
For the next step we focus on the hair. Use different brown oil pastels to add details and depth to the hair. Also use a dark blue for the hairband.
With a light beige and an ochre pastel we lightly sketch in the face color, the hand and the hat. I added some blue for the shadows on the left side of her face (our right side) and the lips.
To define the upper part of the sea we use a teal oil pastel, a gray and a dark blue. This time press a bit harder to lay down the color.

Step 3
Now we’re using lots of pressure to apply the blue oil pastels thickly. It creates this lovely impasto-like look. We also add white and a light yellow color for the lightest part of the wave.
To define the hair more, use the brown pastels again but with more pressure this time.
Add a bit of yellow and brown to the face.
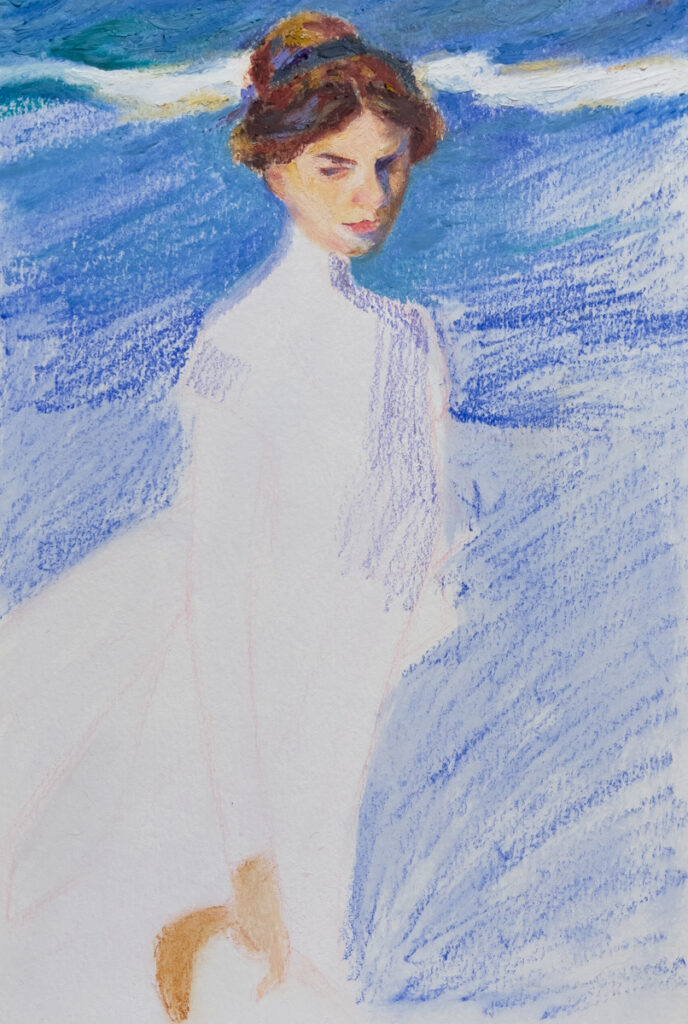
Step 4
Next we’re defining the face and adding the details like eyebrows, eyes and lips. I know it’s very hard to draw details with oil pastels especially if you’re drawing small. Try to use the sharpest side of the oil pastel, use a painting knife or the tip of a pencil to add small details. Having patience and a steady hand also helps.
The good thing with oil pastels is that if you made a wrong mark you can scratch some of the oil pastel away with a palette knife (or your fingernail) and draw over it.
Additionally, add some purple to the hair and to the shadow in the face. With a blue pastel draw more of the water in the background and lightly add the shadow of the dress.

Step 5
For the next step define the water on the left side with more blue pastels. Use a light green with little pressure for the lower right side of the water.
That same light green I also used sparingly for the dress as well as a light purple and a reddish brown. Also add a light layer of teal in the left corner where the sea peaks through her shawls.

Step 6
For the next step we’re defining the dress even more with some grays and light blues. Additionally, we’re adding some yellow ochre to the water on the right.

Step 7
Let’s add some more contrast to the dress by using a darker gray and a little bit of purple. Also we apply white on top to blend a few colors together and to add texture.
After that we block in the basic yellow color of the hat and define the rest of the blue water on the right. Furthermore, we use a bit of green oil pastel for the lower right part of the sea as well as for the left corner.

Step 8
Now we’re finishing the left side of the oil pastel portrait by blending the blues of the water with a light blue pastel and heavy pressure. Additionally we’re darkening the left corner even more with a dark gray pastel and a bit of purple.
The right side also gets more detailed by adding more light green, gray and beige. Don’t forget to add details to the hat with a brown pastel.

Step 9
The last step is to finish the green water on the right. Use the same pastels from the step before interchangeably with more pressure to blend them together and to create a nice texture.
Finally we’ve finished our oil pastel drawing of Sorolla’s painting.
I hope this step by step oil pastel drawing for beginners tutorial was helpful to get you started with your oil pastels. It’s such a fun medium that requires a bit of practice and a little patience.
Here you can watch me draw this piece and follow along:
What next?
Some more oil pastel drawing for beginners tutorials for you:



Leave a Reply