These oil pastel techniques for beginners and intermediates will help you understand this medium better and you’ll be able to create beautiful works of art.
Are Oil Pastels easy for beginners?
Oil pastels are a medium everyone can use and they are especially great for beginner artists. They are versatile, easy to use and unlike oil paints or acrylics require no preparation, brushes or mediums.
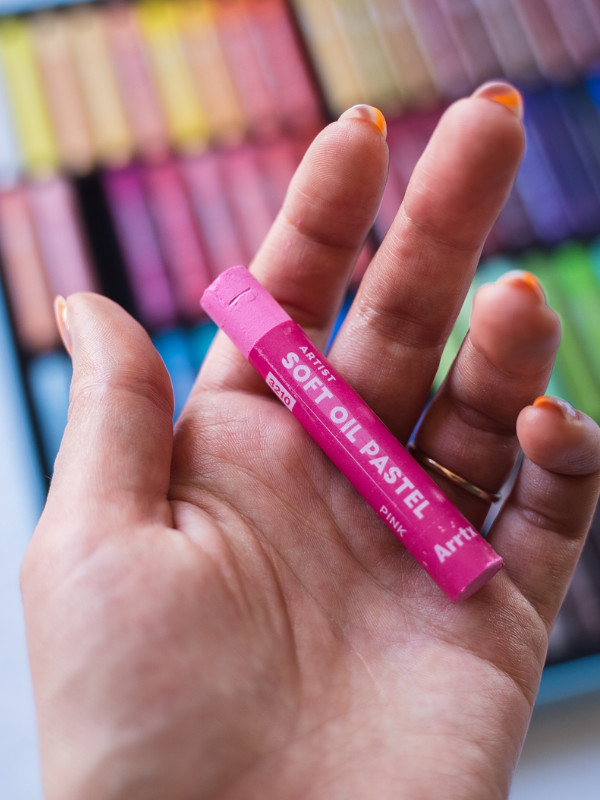
An oil pastel is a stick consisting of pigment and a binder which is usually a mixture of non-drying oil and wax. Oil pastels should not be confused with wax crayons (they use only wax as binder) or soft pastels (natural gum or methyl cellulose as binder) which are powdery and not sticky. If you want to learn more about the different kind of pastels check out this article.
You can use oil pastels on their own or combine them with different media like watercolor or acrylics. Just remember that you can’t apply any wet media on top of oil pastels.
At the end of this article you can find a shopping list with the supplies you’ll need for oil pastel painting.
What do I need to get started with oil pastels?
What paper should i use for oil pastels?

Let’s discuss the drawing surface. You can use oil pastels on any paper and even use them on glass or wood.
The paper makes a difference though. Look at the picture above. The same technique was used but the result looks different because the pieces of paper have different texture. It’s up to you if you prefer a smooth surface or more grit but using a paper made for pastels is always a good idea. Otherwise you can test different watercolor papers until you find your favorite.
Now we can get into the different oil pastel techniques for beginners.
use the edge for lines

To apply the oil pastel you can use the edge of the tip to create thin lines and dots. The stronger you press down the more pigment will stick to the paper. You could even sharpen the oil pastel with a sharpener to get a finer tip. Using the whole side of the pastel will make it easier to color a big area.
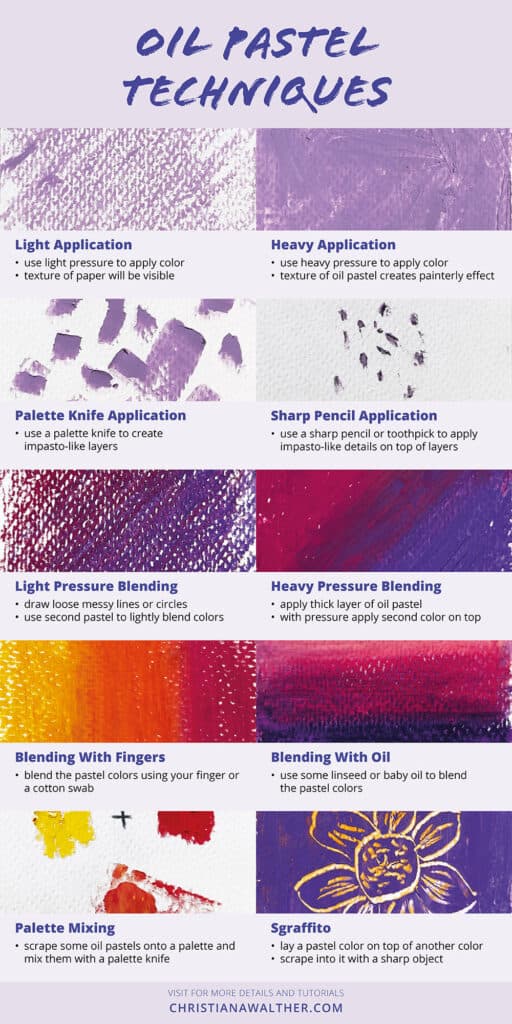
Light Application

For this oil pastel technique you use light pressure to apply the color. If you use a textured paper you will be able to see the texture which can give an interesting effect to your drawing. With a light pressure application you can layer a lot of colors over each other.
Heavy Application

Use more pressure to get a thick layer of oil pastel onto the paper. The texture of a creamy oil pastel will give a beautiful and painterly effect. However, it’s not so easy to layer a lot of colors with this technique because the pigments just get smeared around a lot. It is one of the most common techniques for oil pastel beginners.
Dilute with Oil

For this oil pastel technique you’ll need some oil and a brush or a paper towel/rag. The best oil to use would be oil used for painting like linseed oil or walnut oil because they will dry. For practice and studies you can also use baby oil or whatever oil you have at home but since they are non-drying the artwork won’t be archival, so keep that in mind.
Using solvent is also an option but please pay attention to the safety instructions and keep your room ventilated!
Apply a thin layer of the oil pastel on the area you want to cover and then use some oil on a brush or on a rag and brush over the pigments. The pastel will dilute and you can spread the color around evenly.
You could also put some oil pastel on a palette, add some oil and mix it on the palette and then apply it to the paper. On the palette it’s also easier to mix two or more colors together.
This is a great technique to cover a big area with color to create an underpainting or to add fine details with a thin brush.
Use a palette knife

With this oil pastel technique you can apply a thick impasto-like layer on top of your painting to add details and visual interest. You only need a palette knife or something similar like a bendy ruler for example.
With the tip of the palette knife scratch some of the oil pastel on it and then apply the pastel onto your drawing. You can apply it as thick as you like.
Use a sharp pencil

If you want to add really small details to your drawing like a white reflection in the eye then this technique is really helpful. All you need is a sharp pencil or a toothpick. Just scratch some of the pastel onto the tip of your preferred object and place the pigments on your drawing.
Light Pressure Blending

This technique is super easy and great for loosely mixing or blending colors and creating texture. To achieve this look just draw loose messy lines or circles with your oil pastel, then use a second color and apply it on top or next to it to lightly blend the colors together.
This can be used for blending colors as well as mixing them.
Heavy pressure blending

Apply a thick layer of oil pastel onto your surface. Pick another color and use pressure to apply it on top of it and blend the pigments together.
This is one of the easiest oil pastel techniques for beginners and you can easily lighten or darken a color by applying white or black/dark blue on top of another color. It is also usable for mixing colors.
Blending with Finger or cotton Swab

This oil pastel blending technique is super easy and it will guarantee nice blended gradients. Apply your oil pastel colors next to each other and use a finger or a cotton swab to blend the pigments into each other.
Blending and mixing with oil

For this technique we need oil and a brush or a rag again. Apply your oil pastel colors next to each other and use a brush or rag dipped in oil to blend the pigments into each other and create a nice gradient. After that let it dry for a few hours until it’s dry to the touch.
Mixing on palette

If you need a specific oil pastel color that you can’t seem to mix on the paper you can try mixing it on a palette. Chose the colors you want to mix and with a palette knife scrape some of the oil pastel off and place them on a palette. Then mix the pigments with the palette knife.
Use color theory to get the exact color you want. Additionally, if you use a bit of oil it will be easier to mix.
Sgraffito

For this fun oil pastel technique you need a sharp object. A palette knife or a toothpick will work just fine. Apply your oil pastels onto the surface and layer a pastel color with good coverage on top. After that use your sharp object to scratch into the oil pastels. This technique is great if you want to add visual interest or fine details like thin hairs.
This technique can also be reversed. Firstly use the sharp object to carve into the clean paper. After that draw over it with the oil pastel. Now your engraving should be visible.
Tips
Clean your oil pastels with a paper towel or rag. It’s easy for them to get dirty when applying over each other therefore cleaning them in between will get you saturated results.
Experiment with the different techniques and don’t be scared to use them all or only the one you like best.
Think about the composition of your drawing before so you can build up the layers accordingly. Ultimately layer from background to foreground. For example use the impasto-like palette knife application on the last layer.
How Do I Store my oil pastel paintings?
After learning the oil pastel techniques for beginners it’s time to think about storing your beautiful artwork.
Since oil pastels are made with non-drying oil your drawings and paintings will also never fully dry. They might get a bit harder with time but you would still be able to scratch them off the surface.
Therefore proper storing or displaying is important. If you just want to store your practice paintings in a drawer put a thin sheet of paper in between. If you want to display or sell your paintings it’s recommended to use a fixative spray that protects against dust and smearing. You can also frame your artwork but if you use glass keep in mind that it can smear against it.
Shopping List
Here’s a list of supplies you might need if you want to start drawing with oil pastels.
Oil Pastels
As with any art medium you can get oil pastels in student and artist quality. Usually student quality oil pastels have less pigments and more filler in them than artist quality. If you want really saturated colors you should get artist quality oil pastels. But these are usually much more expensive than student quality.
If you’re a total beginner and just want to see if oil pastels are a medium for you go with the cheaper student quality. There are still great options available. Here are some recommendations:
- Paul Rubens Oil Pastels ($26.99 for a set of 50)
- Pentel Oil Pastels ($2.05 – $46.78)
- Sakura Cray-Pas Expressionist Oil Pastels ($0.72 – $22.59)
- Van Gogh Oil Pastels and Sets ($2.80 – $51.41)
- Best Artist Quality: Sennelier Oil Pastels and Sets ($3.75 – $297.00)
Surface
- Sennelier Oil Pastel Card Pads ($23.16 – $80.02)
- Hand Book Paper Co Pastel Premier Sanded Pastel Paper ($12.47 – $189.59)
- Bee Paper Stipple Paper Pads ($13.28 – $18.10)
Fixative
- Sennelier D’Artigny Pastel Fixative ($15.47)
- Talens Varnish for Oil Pastels ($14.95)
Tutorials
If you want to follow a step by step tutorial for your first oil pastel paintings check out these posts:


i love drawing and i didn’t know abt oil pastel before until i saw a shop called MINISO sell them my first painting was STARRY NIGHT and it came out great for some reasons i did it on a wooded surface, i think wood is the best for me to work on, i loved ur website and for sure planning to visit ur youtube channel cuz i wanna start making art to sell, cuz unfortunatelyi couldn’t study art in a professional way but hope this website will help me to achieve my aim.
So happy you enjoy my blogposts. Wood is indeed a great surface for oil pastels. Keep going and continue drawing <3
Hi Christiana
I live in Queensland Australia am new to oil pastels coming from other art mediums mostly soft pastel for the past 6 years.
Your information is extremely helpful, and I appreciate your sharing your knowledge with really helpful images.
I am really enjoying oil pastels abd will gradually go through your blogs to learn more and become more proficient.
Many thanks
Lozza
Hi Lozza,
thanks for your lovely comment.
I’m really glad you found this helpful.
Keep creating. 🩷